Halloween Candy Table with Chocolates: ideas and tricks
Cristina MolinerAre you preparing a Halloween dessert table with chocolates for a party? We'll help you design it so it looks irresistible and effortless. We give you creative ideas, storage tips, and a step-by-step guide to ensure your table is perfect from start to finish.
Why choose chocolates and artisanal chocolates for Halloween?
Themed chocolates and bonbons work because they combine visual impact and portions for everyone in attendance. They're easy to pick up, don't require utensils, and if stored properly, they maintain their texture and shine all night long. Plus, chocolate lets you play with colors, fillings, and shapes: pumpkins, skulls, bats, coffins... With a good assortment of homemade Halloween desserts , your table becomes the centerpiece of the party.
- Individual portions.
- Possibility of offering gluten-free, lactose-free or vegan options.
- Great decorative versatility: wrappers, toppers, colors and glitter.
Planning: quantities, colors and layout of your table
Before you even think about pumpkins, make a plan. This way, your Halloween chocolate table decor will be cohesive and functional.
1) Calculate quantities per person
- Reception/coffee break: 3–4 pieces per person (small chocolate 8–12 g).
- Main event dessert: 2–3 pieces per person if there are other sweets.
- Children's parties: 4–5 pieces per child (prioritize individual wrapping).
2) Color palette and theme
- Classic: black, orange and violet.
- Elegant Gothic: black, gold and wine red.
- “Cute Halloween”: cake with orange accents and sugar eyes.
- Sci-fi: black, neon green and silver.
Choose two to three dominant colors and apply them to your decorations. Avoid oversaturating them with too many shades; the table should be able to "breathe."
How to decorate a Halloween dessert table: step by step
This method works equally well for discerning individuals and hospitality businesses. It directly answers the question " how to decorate a Halloween dessert table " with a replicable pattern.
- Define the "iconic" piece. A centerpiece: a small cake covered in dark chocolate with spiderweb icing, a hollowed-out chocolate pumpkin filled with mini chocolates, or a tower of "graveyard" truffles.
- Select 4–6 chocolates. Mix textures: crunchy praline, spiced ganache (cinnamon, clove), salted caramel, fruity (passion fruit, raspberry), and 1–2 without priority allergens.
- Heights and bases. Use risers, lined boxes, varnished logs, or acrylic stands. Leave 10–15 cm between levels for clear reading.
- Lighting: Warm, indirect light; avoid halogens on chocolate.
- Textiles and backdrops. Matte black tablecloth, orange or purple runner, or "fog" chiffon. Avoid excessive shine that might compete with the chocolate.
- Containers. Steel trays for the back of the house and ceramic plates or slates for the front.
- Labeling. Flavored and allergen labels (gluten, lactose, nuts, egg, soy). Clear typography and pictograms for speed.
- Flavor order. From mild to intense: white and fruity, pralines, milk, dark and spicy. Finally, mint and liqueurs.
- Takeaway area. Cellulose bags or mini boxes. Ideal for corporate events and schools.
- Replenishment plan. Have buckets refilled every 20–30 minutes to preserve visual freshness.
Halloween Chocolate Table Ideas: 10 Arrangements That Work
Take note of these Halloween chocolate table ideas, ready to be executed in little time and with great effect.
- Dark Alley. Black chocolates with a mirror shine, edible gold accents, slate bases, and LED lanterns. Assortment: 60% cacao, salted caramel, almond praline.
- Pumpkin party. Hollow orange chocolate pumpkins filled with mini truffles. Place them on heights with dried leaves and jute twine.
- Crazy laboratory. Little cups of ganache "potion" with warning labels, chocolates with green powder (colored white chocolate), and sugar test tubes.
- Eyes that look back at you. Spherical truffles with a white chocolate disc and painted pupils. Add a zigzag red gel for a blood effect.
- Gothic glam. Black and burgundy chocolates, golden candlesticks, dark flowers. Use skull molds with raspberry filling.
- Monster Kids. Chocolates with friendly faces, bat-themed toppers, and individual wrappers. Perfect for schools and birthdays.
- Vintage market. Wooden boxes, chalkboards, and glass jars filled with crunchy white chocolate "bones."
- Jap-Haunt. Sushi-bar inspired by narrow trays and nigiri chocolates (ganache on a crispy rectangle) with a chocolate ribbon.
- Spice Route. Pili-pili, chai, and cinnamon. Signs detailing the origins of cacao. Ideal for after-work drinks for adults.
- No star allergens. Free-from line with visible signage. Minimal chic in black and white for differentiation.
- Smart assembly: refrigeration equipment that makes a difference
Homemade Halloween Desserts: Quick and Profitable Ideas
In addition to the chocolate base, complement it with artisanal Halloween desserts for variety and texture.
- Cobweb chocolate bark. A thin black plate with white threads; it breaks into irregular pieces.
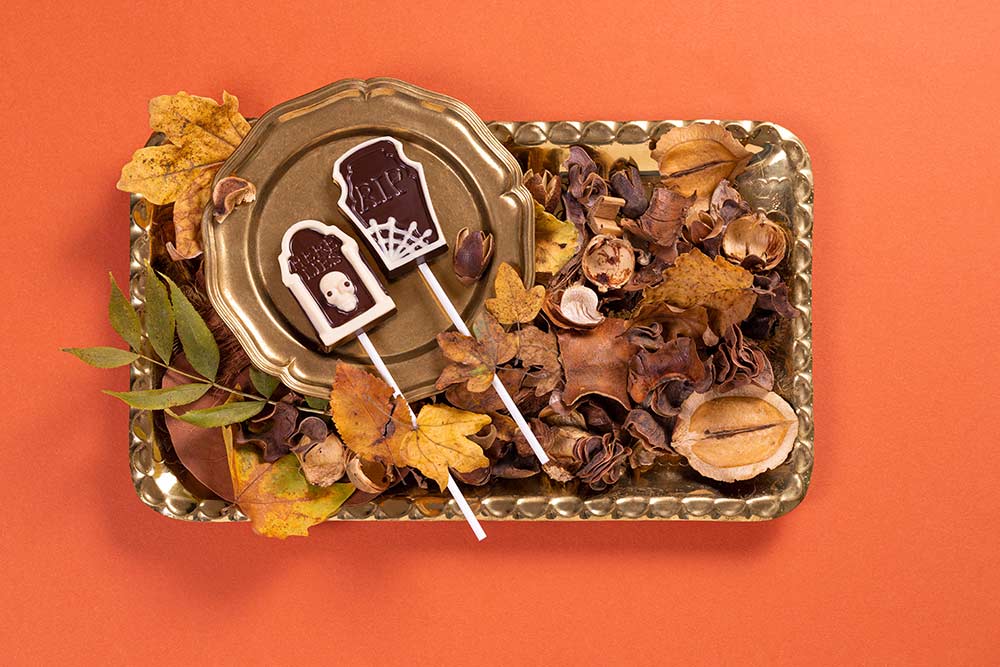
- Grave truffles. Truffle on a cocoa and biscuit crumble with a decorated biscuit tombstone.
- Monster Rocky Road. Chocolate with marshmallows and nuts, cut into cubes; sugar eyes on top.
- Mousse shots. Mini glasses with crumble, mousse, red coulis, and a bat topper.
- Ghost brownie. Brownie squares with white meringue flamed in the shape of a ghost.
Recipes, trends and shopping: useful resources
If you need a ready-to-assemble themed assortment, check out this one. A collection of Halloween chocolates to inspire you with shapes, colors, and combinations. To learn more about the technique (tempering, coating types, shine, and preservation), we recommend reading articles from the blog specializing in chocolate . And if you're encouraged to produce part of the assortment, you'll find artisan chocolate recipes for Halloween that fit perfectly into a themed table.
Assembly and service checklist
- Chocolates in trays by batch and flavor, with labels and allergens.
- Risers, bases and textiles clean and without excessive shine.
- Warm LED lighting, no direct heat on chocolate.
- Gloves and tweezers for hygienic handling.
- Back-up in a cold cupboard or table for replenishment every 20–30 minutes.
- Waste container and microfiber cloths for surfaces.
- “Lifesaver” kit: takeaway bags, gift boxes, extra labels.
Common mistakes and how to avoid them
- Condensation on chocolates. Avoid sudden temperature increases from 4°C to 24°C. Mitigate the shock: 20 minutes in a temperate area or display case at 16°C.
- Melted by spotlights. Isolate the table from heat-related lighting; use LED lights and distance.
- Poorly sequenced flavors. They start mild and end intensely so the diner perceives nuances.
- Overdecoration. Less is more. Leave empty spaces to give prominence to the product.
- Lack of replenishment. 30% of attractiveness is a sense of abundance. Have a rotation plan.
Quick guide to pairings
- Orange and clove bonbon + spiced black tea.
- Hazelnut praline + cold brew coffee.
- Raspberry and 70% cocoa + dry sparkling wine or red kombucha.
- Salted caramel + non-alcoholic warm cider.
- White “bone” chocolate + soft matcha.
Halloween candy table example with chocolates: 60 minutes
For an event of 80 people (cocktail):
- Selection: 5 base flavors + 1 limited edition “pumpkin” (total 6 references).
- Quantity: 3.5 pieces/person → 280–300 pieces.
- Equipment: 1 GN 1/1 cold table for back, 1 positive cabinet for fillings, 1 neutral display case in the room (local at 18 ºC).
- Decoration: Black tablecloth, purple runner, 3 risers, 8 allergen labels, warm LED light.
- Timing: 20 min base assembly + 30 min product placement + 10 min lighting and signage.
Safety, hygiene and sustainability
- Handle with gloves and tongs. Replenishment from back-of-house.
- Records equipment temperatures at the start and mid-session.
- Use compostable wrappers and recyclable labels.
- Anti-leftovers plan: “to-go” boxes at the end of the service.
Conclusion: your sweet table, ready to surprise
With good planning, a coherent assortment, and the support of professional refrigeration equipment, your Halloween candy table with chocolates will shine from start to finish. At Bombonería Pons, we'll help you define the layout, calculate quantities, and choose the ideal combination of display case, refrigerated table, cabinet, and cold storage for your size and budget. Ready to set up a truly spooky table?

FAQs
At what temperature should I store chocolates for a Halloween table?
Solid chocolates or those with non-perishable fillings: 15–18°C, low humidity, and away from direct light. If they contain dairy cream or fresh fruit, store them in a refrigerated cabinet at 4–6°C and warm them 15–25 minutes before serving to restore shine and texture.
How much candy should I prepare per guest for a Halloween dessert table with chocolates?
For cocktail parties or receptions: 3–4 pieces per person. If the dessert is the main course and there are other sweets, 2–3 pieces. For children's events, 4–5 pieces, preferably individually wrapped for hygiene and consumption control.
How do I prevent chocolate from “sweating” or losing its shine when displayed?
Avoid thermal shock: Don't go from 4°C to a hot room all at once. Use a transition zone (a 16°C display case or warm area) before moving the room into the room. Use low-heat LED lighting and keep humidity below 50% whenever possible.
Which refrigeration equipment is best for large volumes at Halloween?
Recommended combination: cold table for preparation and back-up, positive refrigeration cabinet for ready-made trays, display case with digital control for the front of the room (or neutral if the space is cool), and modular storage for stock. All are energy-efficient and easy to clean.